
#include<stdio.h>
#include<conio.h>
#include<graphics.h>
#include<dos.h>
void main()
{
int gd=DETECT,gm,i=-300,j;
int poly[16]={100,100,250,100,250,50,300,50,325,90,325,140,100,140,100,100};
int tpoly[16]={100,100,250,100,250,50,300,50,325,90,325,140,100,140,100,100};
initgraph(&gd,&gm,"");
getch();
while(!kbhit())
{
for(j=0;j<16;j+=2)
{
poly[j]=tpoly[j]+i;
}
fillpoly(8,poly);
setfillstyle(5,7);
bar(275+i,60,295+i,85);
setfillstyle(5,8);
fillellipse(140+i,140,20,20);
fillellipse(280+i,140,20,20);
setfillstyle(1,0);
fillellipse(140+i,140,10,10);
fillellipse(280+i,140,10,10);
setcolor(15);
line(0,160,639,160);
setcolor(0);
setfillstyle(1,4);
delay(20);
cleardevice();
i++;
if(i>550)
i=-300;
}
closegraph();
}
Simple Animation using c program | create car moment in computer Graphics Lab –CS13


2 Dimensional Translation in C program | CS1355-Graphics & Multimedia Lab
Translation is a simple straight line movement of the object in x and y direction. We define an image in coordinate system, to display that image Or object. Transformation is refer to transform from one position to another position depends upon there transformation it is classified into.Scaling.Shearing.Reflection.Rotation see the source code in C coding
Source code programming 2D TRANSFORMATION Coding
#include <stdio.h>
#include <stdlib.h>
#include<graphics.h>
#include<conio.h>
#include<math.h>
void draw2d(int,int [],int [],int,int);
void main()
{
int gd=DETECT,gm;
int x[20],y[20],tx=0,ty=0,i,fs;
initgraph(&gd,&gm,"");
printf("No of sides : ");
scanf("%d",&fs);
printf("Co-ordinates : ");
for(i=0;i<fs;i++)
{
printf("(x%d,y%d)",i,i);
scanf("%d%d",&x[i],&y[i]);
}
draw2d(fs,x,y,tx,ty);
printf("translation (x,y) : ");
scanf("%d%d",&tx,&ty);
draw2d(fs,x,y,tx,ty);
getch();
}
void draw2d(int fs,int x[20],int y[20],int tx,int ty)
{
int i;
for(i=0;i<fs;i++)
{
if(i!=(fs-1))
line(x[i]+tx,y[i]+ty,x[i+1]+tx,y[i+1]+ty);
else
line(x[i]+tx,y[i]+ty,x[0]+tx,y[0]+ty);
}
}
//# Author: J.Ajai
//#Mail-id- ajay.compiler@gmail.com
//# PH:+91-9790402155
OUTPUT
2D TRANSFORMATION
---------------------------------------------------
1.Translation
2.Scaling
3.Shearing
4.Reflection
5.Rotation
Enter your Choice :1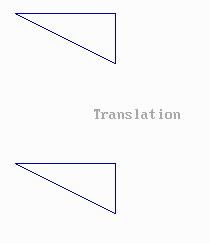
2D TRANSFORMATION
---------------------------------------------------
1.Translation
2.Scaling
3.Shearing
4.Reflection
5.Rotation
Enter your Choice :2
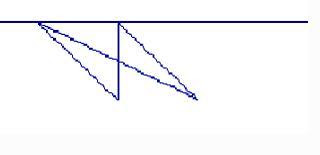
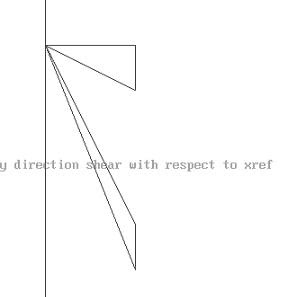
SEE THE FOLLOWING OUTPUT SCALING, SHEARING WITH 2 DIGARM(Shearing Y direction with respect to Xref &,Shearing x direction with respect to yref)
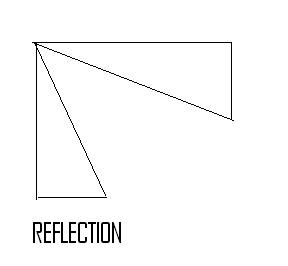
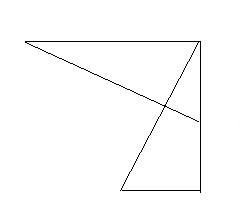
Source coding Output REFLECTION & ROTATION 2D TRANSFORMATION 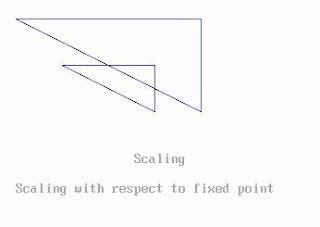
File Transfer FTP Using TCP | source code in C Network Programming
To write a program to a created file from the server to the client.
File transfer TCP Algorithm
Server side Filer Transfer TCP Algorithm
STEP 1: Start the program.
STEP 2: Declare the variables and structure for the socket.
STEP 3: Create a socket using socket functions
STEP 4: The socket is binded at the specified port.
STEP 5: Using the object the port and address are declared.
STEP 6: After the binding is executed the file is specified.
STEP 7: Then the file is specified.
STEP 8: Execute the client program.
Client File Transfer TCP programming
Algorithm
STEP 1: Start the program.
STEP 2: Declare the variables and structure.
STEP 3: Socket is created and connects function is executed.
STEP 4: If the connection is successful then server sends the message.
STEP 5: The file name that is to be transferred is specified in the client side.
STEP 6: The contents of the file is verified from the server side.
STEP 7: Stop the program
Server Side source code programming
#include<string.h>
#include<sys/ioctl.h>
#include<arpa/inet.h>
#include<stdlib.h>
#include<stdio.h>
#include<net/if_arp.h>
.int main()
{
int sd,b,cd;
struct fname[50],op[1000];
struct sockaddr_in caddr,saddr;
FILE *fp;
socklen_t clen=sizeof(caddr);
sd=socket(AF_INET,SOCK_STREAM,0);
if(sd!=-1)
printf(“socket is created”);
else
printf(“socket is not created”);
saddr.sin_family=AF_INET;
saddr.sin_port=htons(2500);
saddr.sin_addr.s_addr=htonl(INADDR_ANY);
b=bind(sd,(struct sockaddr*)&saddr,sizeof(saddr));
if(b==0)
printf(“binded successfully”);
else
printf(“binding failed’);
listen(sd,5);
cd=accept(sd,(struct sockaddr*)&caddr,&clen);
recv(cd,fname,sizeof(fnmae),0);
fp=open(fname,”w”);
fwrite(op,strlen(op),1,fp);
printf(“the file has been transferred”);
close(fd);
close(cd);
fclose(fp);
return 0;
}
Client Side Program:
#include<string.h>
#include<sys/ioctl.h>
#include<arpa/inet.h>
#include<stdlib.h>
#include<stdio.h>
#include<net/if_arp.h>
#include<sys/types.h>
#include<sys/socket.h>
#include<netinet/in.h>
#include<netdb,h>
int main()
{
int sd,c,s;
char fname[50],sip[25],op[1000];
struct sockaddr_in caddr;
struct hostent *he;
FILE *fp;
printf(‘enter the server ip address”);
scanf(“%s”,sip);
he=gethostbyname(sip0;
sd=socket(AF_INET,SOCK_STREAM,0);
if(sd!=1)
printf(“socket created”);
else
printf(“socket is not created’);
caddr.sin_family=AF_INET;
caddr.sin_port=htons(2500);
caddr.sin_addr=*((struct in_addr*)he->h_addr);
c=connect(sd,(struct sockaddr*)&caddr,sizeof(caddr));
if(c==0)
printf(“connected to server”);
else
printf(“connection failed”);
printf(“enter the file name’);
scanf(“%s”,fname);
send(sd,fname,sizeof(fname),0);
fp=fopen(fname,”r”);
fopen(op,1000,1,fp);
send(sd,op,sizeof(op),0);
fclose(fp);
close(sd);
return 0;
}
INPUT OUTPUT CLIENT CS1305 Network Lab
Enter the server ip address 127.0.0.1
Socket created
Connected to the server
Enter the file name cli.txt
cli.txt
Network programming lab
B.tech I.T
Third year
06 sem
SERVER CS1305 Network Lab
Socket is created
Binded successfully
Enter the file name ser.txt
The file has been transferred
Ser.txt
Network programming lab
B.tech I.T
Third year
06 sem
RESULT Thus the program to transfer a file from the client to the server is
executed and verified. Free Download C program.
Implementation Of Queue Adt Using Array Data Structure Lab program
Queue Adt using Array it has the header file qarry.h It contains structure queue create queue Make empty, Dequeue function with appropriate function and variable. Data structure Lab Source code Programming algorithm - CS1152 c/c++
“qarray.h” file Source code Queue adt using Array
#include<stdio.h>
#include<conio.h>
#include<alloc.h>
#include<stdlib.h>
struct Queue
{
int capacity;
int size;
int front;
int rear;
int *array;
};
typedef struct Queue *PtrToNode;
typedef PtrToNode QUEUE;
QUEUE CreateQueue(int max)
{
QUEUE Q;
Q=(struct Queue*)malloc(sizeof(struct Queue));
if(Q==NULL)
printf("\nFatal error");
else
{
Q->size=0;
Q->capacity=max;
Q->front=0;
Q->rear=-1;
Q->array=(int*)malloc(sizeof(int)*max);
if(Q->array==NULL)
printf("\nFatal error");
else
printf("\nQueue is created successfully");
}
return Q;
}
void MakeEmpty(QUEUE Q)
{
Q->size=0;
Q->front=0;
Q->rear=-1;
}
int IsEmpty(QUEUE Q)
{
return Q->size==0;
}
int IsFull(QUEUE Q)
{
return Q->size==Q->capacity;
}
void EnQueue(int x,QUEUE Q)
{
if(IsFull(Q))
printf("\nQueue is Full");
else
{
Q->rear++;
Q->array[Q->rear]=x;
Q->size++;
}
}
void DeQueue(QUEUE Q)
{
if(IsEmpty(Q))
printf("\nQueue is empty");
else
{
Q->front++;
Q->size--;
}
}
int Front(QUEUE Q)
{
return Q->array[Q->front];
}
QUEUE DisposeQueue(QUEUE Q)
{
MakeEmpty(Q);
free(Q->array);
free(Q);
Q=NULL;
return Q;
}
void Display(QUEUE Q)
{
int i;
for(i=Q->front;i<=Q->rear;i++)
printf("\n%d",Q->array[i]);
}
“qarray.c” file Queue adt using Array
#include<stdio.h>
#include"qarray.h"
void main()
{
QUEUE Q=NULL;
int a,size,ch;
printf("\n\n1.CreateQueue\n 2.Enqueue\n 3.Dequeue\n 4.Front\n 5.MakeEmpty\n 6.IsEmpty\n 7.IsFull\n 8.DisposeQueue\n 9.Display\n 10.Exit\n");
X:
printf("\nEnter ur choice:\t");
scanf("%d",&ch);
switch(ch)
{
case 1:
if(Q==NULL)
{
printf("\nEnter the size of queue");
scanf("%d",&size);
Q=CreateQueue(size);
}
else
printf("\nQueue is already created");
break;
case 2:
if(Q==NULL)
printf("\nQueue is not yet created");
else
{
printf("\nEnter the element to insert");
scanf("%d",&a);
EnQueue(a,Q);
}
break;
case 3:
if(Q==NULL)
printf("\nQueue is not yet created");
else
DeQueue(Q);
break;
case 4:
if(Q==NULL)
printf("\nQueue is not yet created");
else
{
a=Front(Q);
printf("\n Front element present in the queue is:\t%d",a);
}
break;
case 5:
if(Q==NULL)
printf("\n Queue is not yet created");
else
{
MakeEmpty(Q);
printf("\n Now Queue becomes empty");
}
break;
case 6:
if(Q==NULL)
printf("\n Queue is not yet created");
else if(IsEmpty(Q))
printf("\n Queue is empty");
else
printf("\n Queue contains some element");
break;
case 7:
if(Q==NULL)
printf("\n Queue is not yet created");
else if(IsFull(Q))
printf("\n Queue is full");
else
printf("\n Queue is not full");
break;
case 8:
if(Q==NULL)
printf("\n Queue is not yet created");
else
{
Q=DisposeQueue(Q);
printf("\n Queue is disposed");
}
break;
case 9:
if(Q==NULL)
printf("\n Queue is not yet created");
else
{
printf("\n The elements in the Queue are:");
Display(Q);
}
break;
case 10:
exit(0);
default:
printf("\n*******WRONG CHOICE********");
}
goto X;
}
OUTPUT Queue adt using Array Data Structure Lap programming algorithm
1.CreateQueue
2.Enqueue
3.Dequeue
4.Front
5.MakeEmpty
6.IsEmpty
7.ISFull
8.DisposeQueue
9.Display
10.Exit
Enter ur choice: 1
Enter the size of queue: 3
Queue is created successfully
Enter ur choice: 2
Enter the element to insert: 100
Enter ur choice: 2
Enter the element to insert: 200
Enter ur choice: 2
Enter the element to insert: 300
Enter ur choice: 2
Enter the element to insert: 400
Queue is Full
Enter ur choice: 6
Queue contains some element
Enter ur choice: 4
Front element present in the queue is: 100
Enter ur choice: 7
Queue is Full
Enter ur choice: 9
The Elements in the queue are:
100
200
300
Enter ur choice: 3
Enter ur choice: 9
The Elements in the queue are:
200
300
Enter ur choice: 7
Queue is not Full
Enter ur choice: 4
Front element present in the queue is: 200
Enter ur choice: 5
Now Queue becomes empty
Enter ur choice: 8
Queue is Disposed
Enter ur choice: 12
***********WRONG ENTRY********
Enter ur choice: 10
Data structure Lab Source code Programming algorithm - CS1152 c/c++
Creating COM Using VB | Component Object Model in Visual BASIC
To create a Component for calculating the employee salary by using VB. Create component Object Model
STEP BY STEP ALGORITHM:
Part-1: ActiveX Control
Building a Simple ActiveX Control in VB
This set of instructions will show you how to build, test and package a trivial ActiveX control. The control is used to calculate the Employee Salary details. The steps are as follows,
1. Open VB 6.0
2. From that select Active-x control then click open.
3. Select add-ins from the main menu select add-in manager. A dialog window will be displayed.
4. Select active-x control interface wizard as loaded and select load as startup. Then click ok
5. Again select add-ins from the main menu. Select active-x control interface wizard. One dialog window will be displayed. In that dialog window click next button.
6. Add a property as salary and also add methods as PF, URA, MR & NET.
7. Click the next button select the data type as double for both property and methods. And finally click the finish button
8. Double click the coding part and type the coding
9. Select the project and run
10. Select file menu select make the project as .ocx save the project and the user control.
Create component Object Model in Visual Basic
Part-2:
Testing your OCX from a new VB project
1. Open VB 6.0
2. Select standard.exe and design the window as shown in the output figure.
3. Select project from the Main menu. From that select components -> select your user control (project name) and then click ok.
4. Place the user control in your designed window.
5. Select the command button and write the proper coding.
Finally run and build your application | component Object Model in Visual Basic
Steps to create data report and data environment:
1. Click components. From that select designer. Then a dialog window displayed in that window select data report & data environment then click add Data Report & Data Environment.
2. Select Add-ins select visual data manager -> select file -> new->select Microsoft access version 7.0 then give a database name then right click the properties click new table give a table name then add the fields (name, salary, city). Finally select Build the table.
3. Select Data Environment. From that right click the connections. Click the properties one dialog window displayed. From that window select Microsoft Jet 3.51 OLE DB providers. Then click next.
4. In the connection tab select your database name, then click test connection a message box will be displayed as Test Connection succeed then click ok. Again In Data Environment, right click connection1 add a command. A new command is added. Now right click the command select properties.
5. In the property window type the SQL statement as select * from your6. Now your fields are added in your command. Then place the fields from Data Environment into Data Report. Then open the property window for Data Report, click data member as your command and then select data source as Data Environment.
7. Then select Data Environment properties. Give the data source and data member.
8. Then write the proper coding.
9. Finally run and build your application.
source code programming
CODING: component object model Source code programming
1. ActiveX Control
Public Property Get salary() As Double
salary = m_salary
End Property

Public Function PF() As Double
PF = m_salary * (8 / 100)
End Function

Public Function URA() As Double
URA = m_salary * (5 / 100)
End Function


Public Function MR() As Double
MR = m_salary * (4 / 100)
End Function

Public Function NET() As Double
NET = Val(m_salary) + Val(PF) + Val(URA) + Val(MR)
End Function

2. Standard Exe
Form 1
Private Sub Command1_Click()
UserControl11.salary = Text3.Text
Text4.Text = UserControl11.PF
Text5.Text = UserControl11.URA
Text6.Text = UserControl11.MR
Text7.Text = UserControl11.NET
End Sub

Private Sub Command2_Click()
Data1.Recordset.AddNew
Data1.Recordset.Fields(0) = Text1.Text
Data1.Recordset.Fields(1) = Text2.Text
Data1.Recordset.Fields(2) = Text3.Text
Data1.Recordset.Update
End Sub

Private Sub Command3_Click()
DataReport1.Show
End Sub
Implement FTP request in Java using socket | How to perform FTP Request
To implement the FTP Request using socket in java CS1404 INTERNET PROGRAMMING LABORATORY .FTP –File transfer Protocol. Ftp is normally is used to sharing or transfer the data from the one computer to the computer. In this sharing we can perform the authentication. This authentication it is not must if wee need. And in this coding it has three module first module Fileserver.java program then second module is Fileclient.java program and the finally module is Fileservert.java program
Source code java programming File Transfer Protocol
ServerFile.java
import java.net.*;
import java.io.*;
public class ServerFile
{
ServerSocket serverSocket;
Socket socket;
int port;
ServerFile()
{
this(9999);
}
ServerFile(int port)
{
this.port = port;
}
void waitForRequests() throws IOException
{
serverSocket = new ServerSocket(port);
while (true)
{
System.out.println("Server Is WAITING...");
socket = serverSocket.accept();
System.out.println("Request Received From " +
socket.getInetAddress()+"@"+socket.getPort());
new ServantFile(socket).start();
System.out.println("Service Started Thread ");
}
}
public static void main(String[] args)
{
try
{
new ServerFile().waitForRequests();
}
catch (IOException e)
{
e.printStackTrace();
}
}
}
source code java programming ClientFile.java
import java.io.*;
import java.net.*;
public class ClientFile
{
String serverAddress;
String fileName;
int port;
Socket socket;
ClientFile()
{
this("localhost", 9999, "Model.txt");
}
ClientFile(String serverAddress, int port, String
fileName)
{
this.serverAddress = serverAddress;
this.port = port;
this.fileName = fileName;
}
void sendRequestForFile() throws UnknownHostException,
IOException
{
socket = new Socket(serverAddress, port);
System.out.println("Connecting to Server...");
PrintWriter writer = new PrintWriter(new
OutputStreamWriter(socket.getOutputStream()));
writer.println(fileName);
writer.flush();
System.out.println("Request has been Sent... ");
getResponseFromServer();
socket.close();
}
void getResponseFromServer() throws IOException
{
BufferedReader reader = new BufferedReader(new
InputStreamReader(socket.getInputStream()));
String response = reader.readLine();
if(response.trim().toLowerCase().equals("filenotfound"))
{
System.out.println(response);
return; }
else
{
BufferedWriter fileWriter = new
BufferedWriter(new
FileWriter("FileRecd.txt"));
do
{
fileWriter.write(response);
fileWriter.flush();
}while((response=reader.readLine())!=null
}while((response=reader.readLine())!=null);
fileWriter.close();
}
}
public static void main(String[] args)
{
try
{
new ClientFile().sendRequestForFile();
}
catch (UnknownHostException er)
{
er.printStackTrace();
}
catch (IOException er)
{
er.printStackTrace();
}
}
}
source code java programming FileServent.java
import java.net.*;
import java.io.*;
public class ServantFile extends Thread
{
Socket socket;
String fileName;
BufferedReader in;
PrintWriter out;
ServantFile(Socket socket) throws IOException
{
this.socket = socket;
in = new BufferedReader(new
InputStreamReader(socket.getInputStream()));
out = new PrintWriter(new
OutputStreamWriter(socket.getOutputStream()));
}
public void run()
{
try
{
fileName = in.readLine();
File file = new File(fileName);
if (file.exists())
{
BufferedReader fileReader = new
BufferedReader(new FileReader(fileName));
String content = null;
while ((content = fileReader.readLine())
!=
null)
{
out.println(content);
out.flush();
}
System.out.println("File has been Sent...");
}
else
{
System.out.println("Requested File was Not
Found...");
out.println("File Not Found");
out.flush();
}
socket.close();
System.out.println("Connection Closed!");
}
catch (FileNotFoundException e)
{
e.printStackTrace();
}
catch (IOException e)
{
e.printStackTrace();
}
}
public static void main(String[] args)
{
}
}
Output: FTP REQUEST
C:\IPLAB>javac ServerFile.java
C:\IPLAB>javac ClientFile.java
C:\IPLAB>javac FileServent.java
C:\IPLAB>copy con Model.txt
Welcome to FTP
C:\IPLAB>java ServerFile
Server Is WAITING...
C:\IPLAB>java ClientFile
Connecting to Server...
Request has been Sent...
C:\IPLAB>java ServerFile
Server Is WAITING...
Request Received From /127.0.0.1@2160
Service Started Thread
Server Is WAITING...
File has been Sent...
Connection Closed!
C:\IPLAB>type FileRecd.txt
Welcome to FTP
Airthematic Operation in Java RMI | Add Two Number Java RMI Program
To write a program for addition of two numbers using RMI (Remote Method Invocation).
Step by step procedure Algorithm For Java RMI
• The client program does not have local access to the class from which a local or remote object was instantiated RMI services can download the class file.
Steps:
• Define the remote interface
• Implement the server
• Implement the client
• Compile the source files
• Start the Java RMI registry, server, and client
The files needed for this program are:
• addintf.java - a remote interface
• addServer.java - a remote object implementation that implements the remote interface
• addClient.java - a simple client that invokes a method of the remote interface
• addImpl.java-a simple implementation file.
Implement the server
The implementation class add Server implements the remote interface addIntf, providing an implementation for the remote method. The method does not need to declare that it throws any exception because the method implementation itself does not throw Remote Exception nor does it throw any other checked exceptions.
Compile the source files
The source files for this example can be compiled as follows:
javac addIntf2.java
javac addImpl2.java
javac addServer2.java
javac addClient2.java
Generate Stubs and Skeletons
To create stub and skeleton files, run the rmic compiler on the names of compiled class files that contain remote object implementations. rmic takes one or more class names as input and produces as output class files of the form Server _Skel.class and Server _Stub.class.
rmic addImpl
the preceding command creates the following stub and skeleton files
• Server _Stub.class
• Server _Skel.class
Start the Java RMI registry, server, and client
To run this example, you will need to do the following:
• Start the Java RMI registry
• Start the server
• Run the client
Start the Java RMI registry
Before start the RMI Registry we should be set path of the registry, type the following command
Set path=c:\jdk1.5\bin
To start the registry, run the rmiregistry command on the server's host. This command produces no output (when successful) and is typically run in the background.
For example, on Windows platforms:
start rmiregistry
1. Finally the RMI program is executed as shown in the output window.
Source Code Programming
a) Server Program
import java.rmi.*;
import java.net.*;
public class AddServer2
{
public static void main(String arg[])throws RemoteException
{
try
{
AddImpl2 obj=new AddImpl2();
Naming.rebind("AddServer2",obj);
}
catch(Exception e)
{}
}
}
b) Client Program
import java.rmi.*;
import java.net.*;
public class AddClient2
{
public static void main(String arg[])throws Exception
{
try
{
String addServerURL="rmi://"+arg[0]+"/AddServer2";
AddIntf2 oo=(AddIntf2)Naming.lookup(addServerURL);
double d1=Double.valueOf(arg[1]).doubleValue();
double d2=Double.valueOf(arg[2]).doubleValue();
System.out.print("Output ");
System.out.println(oo.add(d1,d2));
}
catch(Exception e)
{
System.out.println(e);
}
}
}
c) Interface Program
import java.rmi.*;
public interface AddIntf2 extends Remote
{
double add(double d1,double d2) throws RemoteException;
}
d) Implementation Program
import java.rmi.*;
import java.rmi.server.*;
public class AddImpl2 extends UnicastRemoteObject implements AddIntf2
{
public AddImpl2()throws RemoteException
{}
public double add(double d1,double d2) throws RemoteException
{
return (d1+d2);
}
}
EJB And Java RMI program
DIALOG BASED APPLICATION | CREATE DIALOG BASED APPLICATION WITH VARIOUS CONTROL USING VC++
OBJECTIVE:
To create a dialog based application with various control using VC++.
PROCEDURE:
1. Run the MFC AppWizard(exe) to generate dialog
2. In step1 dialog based application select the default settings and press OK button.
3. In resource view click on the dialog and select the IDD_DIALOG1
4. Design the dialog using the dialog editor
5. Use edit controls to get the name, age combo boxes for date for birth, edit box to read the parents name, monthly income, list box, to list the education
6. Right click on the monthly income select class wizard->member variables
7. In edit4 (monthly income) select the variable namaes m_sal and select the data type as int and click OK.
8. In date of birth using combo boxes for day ,month, year
9. Right click on the list box select properties and give the ID name as IDC_EDU
10. Radio button yes, no to check the transfer certificate availability
11. Radio button yes, no to check the birth certificate availability
12. One command button for selection and another to quit the project
13. In dialogdlg.h declare 2 variables
Public:
CString SelString1;
CListBox *m_fath_edu;
14. In the Dialog Dlg.cpp add the following code OnInit Dialog function
CListBox *PLB=(CListBox *)GetDlgItem(IDC_EDU);
PLB->InsertString(-1,"Graduate");
PLB->InsertString(-1,"Post Graduate");
PLB->InsertString(-1,"High School");
PLB->InsertString(-1,"Professional");
PLB->InsertString(-1,"Illiterate");
15. Using the class wizard map the object Id as IDC_EDU with the message LBN_selchange notification handler is created with this OnSelChangeEdu()
void CDialogDlg::OnSelchangeEdu()
{
// TODO: Add your control notification handler code here
int SelIndex1;
m_fath_edu=(CListBox*)GetDlgItem(IDC_EDU);
SelIndex1=m_fath_edu->GetCurSel();
m_fath_edu->GetText(SelIndex1,SelString1);
}
16. Using the class wizard map the object Id as IDC_BUTTON1 with the message BN_CLICKED a notification handler is created with this OnButton1()
void CDialogDlg::OnButton1()
{
// TODO: Add your control notification handler code here
UpdateData(true);
if((m_sal*12>10000)&&(SelString1!="Illiterate"))
MessageBox("Student Selected");
else
MessageBox("Student not selected");
}
17. Using the class wizard map the object Id as IDC_BUTTON1 with the message BN_ CLICKED a notification handleris created with the OnButton2()
void CDialogDlg::OnButton2()
{
PostQuitMessage(0);
}
18. Run and test the application
PROGRAM:
SOURCE FILES:
Dialogdlg.cpp:
#include "stdafx.h"
#include "dialog.h"
#include "dialogDlg.h"
#ifdef _DEBUG
#define new DEBUG_NEW
#undef THIS_FILE
static char THIS_FILE[] = __FILE__;
#endif
/////////////////////////////////////////////////////////////////////////////
// CAboutDlg dialog used for App About
class CAboutDlg : public CDialog
{
public:
CAboutDlg();
// Dialog Data
//{{AFX_DATA(CAboutDlg)
enum { IDD = IDD_ABOUTBOX };
//}}AFX_DATA
// ClassWizard generated virtual function overrides
//{{AFX_VIRTUAL(CAboutDlg)
protected:
virtual void DoDataExchange(CDataExchange* pDX); // DDX/DDV support
//}}AFX_VIRTUAL
// Implementation
protected:
//{{AFX_MSG(CAboutDlg)
//}}AFX_MSG
DECLARE_MESSAGE_MAP()
};
CAboutDlg::CAboutDlg() : CDialog(CAboutDlg::IDD)
{
//{{AFX_DATA_INIT(CAboutDlg)
//}}AFX_DATA_INIT
}
void CAboutDlg::DoDataExchange(CDataExchange* pDX)
{ CDialog::DoDataExchange(pDX);
//{{AFX_DATA_MAP(CAboutDlg)
//}}AFX_DATA_MAP
}
BEGIN_MESSAGE_MAP(CAboutDlg, CDialog)
//{{AFX_MSG_MAP(CAboutDlg)
// No message handlers
//}}AFX_MSG_MAP
END_MESSAGE_MAP()
/////////////////////////////////////////////////////////////////////////////
// CDialogDlg dialog
CDialogDlg::CDialogDlg(CWnd* pParent /*=NULL*/)
: CDialog(CDialogDlg::IDD, pParent)
{
//{{AFX_DATA_INIT(CDialogDlg)
// NOTE: the ClassWizard will add member initialization here
//}}AFX_DATA_INIT
// Note that LoadIcon does not require a subsequent DestroyIcon in Win32
m_hIcon = AfxGetApp()->LoadIcon(IDR_MAINFRAME);
}
void CDialogDlg::DoDataExchange(CDataExchange* pDX)
{
CDialog::DoDataExchange(pDX);
//{{AFX_DATA_MAP(CDialogDlg)
// NOTE: the ClassWizard will add DDX and DDV calls here
//}}AFX_DATA_MAP
}
BEGIN_MESSAGE_MAP(CDialogDlg, CDialog)
//{{AFX_MSG_MAP(CDialogDlg)
ON_WM_SYSCOMMAND()
ON_WM_PAINT()
ON_WM_QUERYDRAGICON()
ON_LBN_SELCHANGE(IDC_EDU, OnSelchangeEdu)
ON_BN_CLICKED(IDC_BUTTON1, OnButton1)
ON_BN_CLICKED(IDC_BUTTON2, OnButton2)
//}}AFX_MSG_MAP
END_MESSAGE_MAP()
/////////////////////////////////////////////////////////////////////////////
// CDialogDlg message handlers
BOOL CDialogDlg::OnInitDialog()
{
CDialog::OnInitDialog();
CListBox *PLB=(CListBox *)GetDlgItem(IDC_EDU);
PLB->InsertString(-1,"Graduate");
PLB->InsertString(-1,"Post Graduate");
PLB->InsertString(-1,"High School");
PLB->InsertString(-1,"Professional");
PLB->InsertString(-1,"Illiterate");
// Add "About..." menu item to system menu.
// IDM_ABOUTBOX must be in the system command range.
ASSERT((IDM_ABOUTBOX & 0xFFF0) == IDM_ABOUTBOX);
ASSERT(IDM_ABOUTBOX < psysmenu =" GetSystemMenu(FALSE);">AppendMenu(MF_SEPARATOR);
pSysMenu->AppendMenu(MF_STRING, IDM_ABOUTBOX, strAboutMenu);
}
}
// Set the icon for this dialog. The framework does this automatically
// when the application's main window is not a dialog
SetIcon(m_hIcon, TRUE); // Set big icon
SetIcon(m_hIcon, FALSE); // Set small icon
// TODO: Add extra initialization here
return TRUE; // return TRUE unless you set the focus to a control
}
void CDialogDlg::OnSysCommand(UINT nID, LPARAM lParam)
{
if ((nID & 0xFFF0) == IDM_ABOUTBOX)
{
CAboutDlg dlgAbout;
dlgAbout.DoModal();
}
else
{
CDialog::OnSysCommand(nID, lParam);
}
}
// If you add a minimize button to your dialog, you will need the code below
// to draw the icon. For MFC applications using the document/view model,
// this is automatically done for you by the framework.
void CDialogDlg::OnPaint()
{
if (IsIconic())
{ CPaintDC dc(this); // device context for painting
SendMessage(WM_ICONERASEBKGND, (WPARAM) dc.GetSafeHdc(), 0);
// Center icon in client rectangle
int cxIcon = GetSystemMetrics(SM_CXICON);
int cyIcon = GetSystemMetrics(SM_CYICON);
CRect rect;
GetClientRect(&rect);
int x = (rect.Width() - cxIcon + 1) / 2;
int y = (rect.Height() - cyIcon + 1) / 2;
// Draw the icon
dc.DrawIcon(x, y, m_hIcon);
}
else
{
CDialog::OnPaint();
}
}
// The system calls this to obtain the cursor to display while the user drags
// the minimized window.
HCURSOR CDialogDlg::OnQueryDragIcon()
{
return (HCURSOR) m_hIcon;
}
void CDialogDlg::OnSelchangeEdu()
{
// TODO: Add your control notification handler code here
int SelIndex1;
m_fath_edu=(CListBox*)GetDlgItem(IDC_EDU);
SelIndex1=m_fath_edu->GetCurSel();
m_fath_edu->GetText(SelIndex1,SelString1);
}
void CDialogDlg::OnButton1()
{
// TODO: Add your control notification handler code here
UpdateData(true);
if((m_sal*12>10000)&&(SelString1!="Illiterate"))
MessageBox("Student Selected");
else
MessageBox("Student not selected");
}
void CDialogDlg::OnButton2()
{
// TODO: Add your control notification handler code here
PostQuitMessage(0);
}
Header Files:
DialogDlg.h:
#if !defined(AFX_DIALOGDLG_H__013D32FD_7256_4F10_88B6_12F86426ED57__INCLUDED_)
#define AFX_DIALOGDLG_H__013D32FD_7256_4F10_88B6_12F86426ED57__INCLUDED_
#if _MSC_VER > 1000
#pragma once
#endif // _MSC_VER > 1000
/////////////////////////////////////////////////////////////////////////////
// CDialogDlg dialog
class CDialogDlg : public CDialog
{
// Construction
public:
CDialogDlg(CWnd* pParent = NULL); // standard constructor
CString SelString1;
CListBox *m_fath_edu;
// Dialog Data
//{{AFX_DATA(CDialogDlg)
enum { IDD = IDD_DIALOG_DIALOG };
// NOTE: the ClassWizard will add data members here
//}}AFX_DATA
// ClassWizard generated virtual function overrides
//{{AFX_VIRTUAL(CDialogDlg)
protected:
virtual void DoDataExchange(CDataExchange* pDX); // DDX/DDV support
//}}AFX_VIRTUAL
protected:
HICON m_hIcon;
// Generated message map functions //{{AFX_MSG(CDialogDlg)
virtual BOOL OnInitDialog();
afx_msg void OnSysCommand(UINT nID, LPARAM lParam);
afx_msg void OnPaint();
afx_msg HCURSOR OnQueryDragIcon();
afx_msg void OnSelchangeEdu();
afx_msg void OnButton1();
afx_msg void OnButton2();
//}}AFX_MSG
DECLARE_MESSAGE_MAP()
};
//{{AFX_INSERT_LOCATION}}
// Microsoft Visual C++ will insert additional declarations immediately before the previous line.
#endif // !defined(AFX_DIALOGDLG_H__013D32FD_7256_4F10_88B6_12F86426ED57__INCLUDED_)
THREAD | TO CREATE AND IMPLEMENT THE USE OF THEREAD IN VC++
OBJECTIVE:
To implement the use of threads in vc++.
PROCEDURE:
1. Run the MFC appwizard(dll) to generate the application c:\thread
2. Select the ingle document in step 1 of appwizard
3. Select all the default settings except printing and print preview
4. Using the resource view, right click on the dialog and select the new dialog
5. Create new dialog box named IDC_PROGRESS1
6. Name the new dialog on IDD_COMPUTE using properties
7. The default OK button can be changed to IDC_START
8. Leave the default cancel button as such
9. By clicking on the dialog IDD_COMPUTE the system will automatically ask for a class name ive the classname as CComputeDlg
10. Using the class wizard map the message BN_CLICKED to the IDC_START, IDC_CANCEL objects
11. Declare the following in the compute DLG.H file next to #ENDIF
#define WM_THREADFINISHED
class CComputeDlg : public CDialog
{
LRESULT OnThreadFinished(WPARAM wparam,LPARAM lparam);
private:
int m_nTimer;
public:
enum{nMaxCount=10000};
12. Using class wizard map the message WM_TIMER to the CComputeDlg.cpp files as follows
void CComputeDlg::OnTimer(UINT nIDEvent)
{
CProgressCtrl*pBar=(CProgressCtrl*)GetDlgItem(IDC_PROGRESS1);
pBar->SetPos(g_nCount*100/nMaxCount);
CDialog::OnTimer(nIDEvent);
}
13. Type the following in compute Dlg.cpp type the definition of the thread before the constructor next to #endif
int g_nCount=0;
UINT ComputeThreadProc(LPVOID pParam)
{
volatile int nTemp;
for(g_nCount=0;g_nCountEnableWindow(FALSE);
AfxBeginThread(ComputeThreadProc,GetSafeHwnd(),THREAD_PRIORITY_NORMAL);
}
void CComputeDlg::OnCancel()
{
if(g_nCount==0)
{
CDialog::OnCancel();
}
else
{
g_nCount=nMaxCount;
}
}
15. Type the OnThreadFinished definition in the end of ComputeDlg.cpp file
LRESULT CComputeDlg::OnThreadFinished(WPARAM wparam,LPARAM lparam)
{
CDialog::OnOK();
return 0;
}
16. Using the class wizard map the CThreadView class an edit the following
void CThreadView::OnLButtonDown(UINT nFlags, CPoint point)
{
dlg.DoModal();
CView::OnLButtonDown(nFlags, point);
}
17. And in OnDraw function of CThreadView.cpp type the following
pDC->TextOut(0,0,"press the left mouse button here");
18. Include the header file of ComputeDlg in CThreadView.cpp
#include "ComputeDlg.h"
19. Compile and run and test the application
PROGRAM:
SOURCE FILES:
Computedlg.cpp :
#include "stdafx.h"
#include "thread.h"
#include "ComputeDlg.h"
#ifdef _DEBUG
#define new DEBUG_NEW
#undef THIS_FILE
static char THIS_FILE[] = __FILE__;
#endif
/////////////////////////////////////////////////////////////////////////////
// CComputeDlg dialog
int g_nCount=0;
UINT ComputeThreadProc(LPVOID pParam)
{
volatile int nTemp;
for(g_nCount=0;g_nCountEnableWindow(FALSE);
AfxBeginThread(ComputeThreadProc,GetSafeHwnd(),THREAD_PRIORITY_NORMAL);
}
void CComputeDlg::OnCancel()
{
// TODO: Add extra cleanup here
if(g_nCount==0)
{
CDialog::OnCancel();
}
else
{
g_nCount=nMaxCount;
}
}
void CComputeDlg::OnTimer(UINT nIDEvent)
{
// TODO: Add your message handler code here and/or call default
CProgressCtrl*pBar=(CProgressCtrl*)GetDlgItem(IDC_PROGRESS1);
pBar->SetPos(g_nCount*100/nMaxCount);
CDialog::OnTimer(nIDEvent);
}
LRESULT CComputeDlg::OnThreadFinished(WPARAM wparam,LPARAM lparam)
{
CDialog::OnOK();
return 0;
}
Threadview.cpp :
// threadView.cpp : implementation of the CThreadView class
#include "stdafx.h"
#include "thread.h"
#include "threadDoc.h"
#include "threadView.h"
#include "ComputeDlg.h"
#ifdef _DEBUG
#define new DEBUG_NEW
#undef THIS_FILE
static char THIS_FILE[] = __FILE__;
#endif
/////////////////////////////////////////////////////////////////////////////
// CThreadView
IMPLEMENT_DYNCREATE(CThreadView, CView)
BEGIN_MESSAGE_MAP(CThreadView, CView)
//{{AFX_MSG_MAP(CThreadView)
ON_WM_LBUTTONDOWN()
//}}AFX_MSG_MAP
END_MESSAGE_MAP()
/////////////////////////////////////////////////////////////////////////////
// CThreadView construction/destruction
CThreadView::CThreadView()
{
}
CThreadView::~CThreadView()
{
}
BOOL CThreadView::PreCreateWindow(CREATESTRUCT& cs)
{
// TODO: Modify the Window class or styles here by modifying
// the CREATESTRUCT cs
return CView::PreCreateWindow(cs);
}
/////////////////////////////////////////////////////////////////////////////
// CThreadView drawing
void CThreadView::OnDraw(CDC* pDC)
{
CThreadDoc* pDoc = GetDocument();
ASSERT_VALID(pDoc);
// TODO: add draw code for native data here
pDC->TextOut(0,0,"press the left mouse button here");
}
/////////////////////////////////////////////////////////////////////////////
// CThreadView diagnostics
#ifdef _DEBUG
void CThreadView::AssertValid() const
{
CView::AssertValid();
}
void CThreadView::Dump(CDumpContext& dc) const
{
CView::Dump(dc);
}
CThreadDoc* CThreadView::GetDocument() // non-debug version is inline
{
ASSERT(m_pDocument->IsKindOf(RUNTIME_CLASS(CThreadDoc)));
return (CThreadDoc*)m_pDocument;
}
#endif //_DEBUG
/////////////////////////////////////////////////////////////////////////////
// CThreadView message handlers
void CThreadView::OnLButtonDown(UINT nFlags, CPoint point)
{
dlg.DoModal();
CView::OnLButtonDown(nFlags, point);
}
HEADER FILES:
Computedlg.h :
#if !defined(AFX_COMPUTEDLG_H__62A874DD_70BF_4129_BE3F_1BD11DCF341D__INCLUDED_)
#define AFX_COMPUTEDLG_H__62A874DD_70BF_4129_BE3F_1BD11DCF341D__INCLUDED_
#if _MSC_VER > 1000
#pragma once
#endif // _MSC_VER > 1000
// ComputeDlg.h : header file
//
#define WM_THREADFINISHED WM_USER +5
UINT ComputeThreadProc(LPVOID pParam);
/////////////////////////////////////////////////////////////////////////////
// CComputeDlg dialog
class CComputeDlg : public CDialog
{
// Construction
LRESULT OnThreadFinished(WPARAM wparam,LPARAM lparam);
private:
int m_nTimer;
public:
enum{nMaxCount=10000};
CComputeDlg(CWnd* pParent = NULL); // standard constructor
// Dialog Data
//{{AFX_DATA(CComputeDlg)
enum { IDD = IDD_COMPUTE };
// NOTE: the ClassWizard will add data members here
//}}AFX_DATA
// Overrides
// ClassWizard generated virtual function overrides
//{{AFX_VIRTUAL(CComputeDlg)
protected:
virtual void DoDataExchange(CDataExchange* pDX); // DDX/DDV support
//}}AFX_VIRTUAL
protected:
// Generated message map functions
//{{AFX_MSG(CComputeDlg)
afx_msg void OnStart();
virtual void OnCancel();
afx_msg void OnTimer(UINT nIDEvent);
//}}AFX_MSG
DECLARE_MESSAGE_MAP()
};
//{{AFX_INSERT_LOCATION}}
// Microsoft Visual C++ will insert additional declarations immediately before the previous line.
#endif // !defined(AFX_COMPUTEDLG_H__62A874DD_70BF_4129_BE3F_1BD11DCF341D__INCLUDED_)
Create magic square of the required size using the MSFlexgrid option in visual basic.
Procedure: First you know what mean magic square is. When ever you add column value and row value it is become the same value example if you give input as 5 then it will draw 5*5 matrixes it fill there 25 numeric value depends on the magic square logic . After fill the value you add column it is equal to 65 and when you add row it is equal to 65.
Output Screen shot of the magic square 17+24+1+8+15=65
23+5+7+14+16=65
Source CODE Visual Programming
Dim N As Integer
Private Sub MagicSquare()
Dim Row As Integer, Column As Integer, I As Integer, Number As Integer
Dim Magic(100, 100) As Integer
Number = 1
Row = 0
Column = (N + 1) / 2 - 1
Magic(Row, Column) = Number
For I = 2 To N * N
If Number Mod N <> 0 Then
Row = Row - 1
Column = Column + 1
Else
Row = Row + 1
End If
If Row < 0 Then Row = N - 1
If Column > N - 1 Then Column = 0
Number = Number + 1
Magic(Row, Column) = Number
Next I
'Loops to put the values into grid
For Row = 0 To N - 1
For Column = 0 To N - 1
MSFlexGrid1.Row = Row
MSFlexGrid1.Col = Column
MSFlexGrid1.Text = Format(Magic(Row, Column), "#####")
Next Column
Next Row
End Sub
Private Sub Form_Load()
Do While N Mod 2 = 0
N = Val(InputBox("Enter an Odd Number (Ex: 3, 5, 7 etc.)", _
"Order of Magic Square", 5))
Loop
MSFlexGrid1.Left = 0
MSFlexGrid1.Top = 0
MSFlexGrid1.Rows = N
MSFlexGrid1.Cols = N
Call MagicSquare
End Sub
Private Sub Form_Resize()
MSFlexGrid1.Width = Me.ScaleWidth
MSFlexGrid1.Height = Me.ScaleHeight
End Sub
Calculate Age of the Candidate Using Data Picker Control in Visual programming
Procedure: create form using Data Picker Control and command button. Create the two commands Picker control and three text box for show result years month date for the candidate age. One command button to perform the execution. Using the Data picker it will user giver there input month data year. So there birth date and current date are getting by through this method .Finally write the code.
Output of Age calculation in year month date 
Source CODE Visual Programming Data picker control
Private Sub Command1_Click()
Text1.Text = DTPicker2.Year - DTPicker1.Year
Text2.Text = DTPicker2.Month - DTPicker1.Month
Text3.Text = DTPicker2.Day - DTPicker1.Day
If (DTPicker2.Month < DTPicker1.Month) Then
Text2.Text = Val(Text2.Text) + 12
Text1.Text = Val(Text1.Text) - 1
End If
If (DTPicker2.Day < DTPicker1.Day) Then
Text3.Text = Val(Text3.Text) + 30
Text2.Text = Val(Text2.Text) - 1
End If
End Sub
Multiple Document Interface Source code Windows SDK / Visual C++ Programming
Source code visual programming step by step Algorithm
VIEW.H
// john52View.h : interface of the Cjohn52View class
#if !defined(AFX_john52VIEW_H__5A302433_602C_4F64_9D17_FBA7D351BC28__INCLUDED_)
#define AFX_john52VIEW_H__5A302433_602C_4F64_9D17_FBA7D351BC28__INCLUDED
#if _MSC_VER > 1000
#pragma once
#endif // _MSC_VER > 1000
class Cjohn52View : public CView
{
protected: // create from serialization only
Cjohn52View();
DECLARE_DYNCREATE(Cjohn52View)
// Attributes
public:
Cjohn52Doc* GetDocument();
private:
int m_ncolor;
CRect m_RectEllipse;
// Operations
public:
// Overrides
// ClassWizard generated virtual function overrides
//{{AFX_VIRTUAL(Cjohn52View)
public:
virtual void OnDraw(CDC* pDC); // overridden to draw this view
virtual BOOL PreCreateWindow(CREATESTRUCT& cs);
protected:
virtual BOOL OnPreparePrinting(CPrintInfo* pInfo);
virtual void OnBeginPrinting(CDC* pDC, CPrintInfo* pInfo);
virtual void OnEndPrinting(CDC* pDC, CPrintInfo* pInfo);
//}}AFX_VIRTUAL
// Implementation
public:
virtual ~Cjohn52View();
#ifdef _DEBUG
virtual void AssertValid() const;
virtual void Dump(CDumpContext& dc) const;
#endif
protected:
// Generated message map functions
protected:
//{{AFX_MSG(Cjohn52View)
afx_msg void OnLButtonDown(UINT nFlags, CPoint point);
//}}AFX_MSG
DECLARE_MESSAGE_MAP()
};
#ifndef _DEBUG // debug version in john52View.cpp
inline Cjohn52Doc* Cjohn52View::GetDocument()
{ return (Cjohn52Doc*)m_pDocument; }
#endif
//{{AFX_INSERT_LOCATION}}
// Microsoft Visual C++ will insert additional declarations immediately before the previous line.
#endif // !defined(AFX_john52VIEW_H__5A302433_602C_4F64_9D17_FBA7D351BC28__INCLUDED_)
VIEW.CPP
// john52View.cpp : implementation of the Cjohn52View class
#include "stdafx.h"
#include "john52.h"
#include "john52Doc.h"
#include "john52View.h"
#ifdef _DEBUG
#define new DEBUG_NEW
#undef THIS_FILE
static char THIS_FILE[] = __FILE__;
#endif
// Cjohn52View
IMPLEMENT_DYNCREATE(Cjohn52View, CView)
BEGIN_MESSAGE_MAP(Cjohn52View, CView)
//{{AFX_MSG_MAP(Cjohn52View)
ON_WM_LBUTTONDOWN()
//}}AFX_MSG_MAP
// Standard printing commands
ON_COMMAND(ID_FILE_PRINT, CView::OnFilePrint)
ON_COMMAND(ID_FILE_PRINT_DIRECT, CView::OnFilePrint)
ON_COMMAND(ID_FILE_PRINT_PREVIEW, CView::OnFilePrintPreview)
END_MESSAGE_MAP()
// Cjohn52View construction/destruction
Cjohn52View::Cjohn52View():m_RectEllipse(100,100,200,300)
{
m_ncolor=BLACK_BRUSH;
}
Cjohn52View::~Cjohn52View()
{
}
BOOL Cjohn52View::PreCreateWindow(CREATESTRUCT& cs)
{
// TODO: Modify the Window class or styles here by modifying
// the CREATESTRUCT cs
return CView::PreCreateWindow(cs);
}
// Cjohn52View drawing
void Cjohn52View::OnDraw(CDC* pDC)
{
Cjohn52Doc* pDoc = GetDocument();
ASSERT_VALID(pDoc);
// TODO: add draw code for native data here
pDC->TextOut(10,10,"**john**");
pDC->SelectStockObject(m_ncolor);
pDC->Ellipse(m_RectEllipse);
}
// Cjohn52View printing
BOOL Cjohn52View::OnPreparePrinting(CPrintInfo* pInfo)
{
// default preparation
return DoPreparePrinting(pInfo);
}
void Cjohn52View::OnBeginPrinting(CDC* /*pDC*/, CPrintInfo* /*pInfo*/)
{
// TODO: add extra initialization before printing
}
void Cjohn52View::OnEndPrinting(CDC* /*pDC*/, CPrintInfo* /*pInfo*/)
{
// TODO: add cleanup after printing
}
// Cjohn52View diagnostics
#ifdef _DEBUG
void Cjohn52View::AssertValid() const
{
CView::AssertValid();
}
void Cjohn52View::Dump(CDumpContext& dc) const
{
CView::Dump(dc);
}
Cjohn52Doc* Cjohn52View::GetDocument() // non-debug version is inline
{
ASSERT(m_pDocument->IsKindOf(RUNTIME_CLASS(Cjohn52Doc)));
return (Cjohn52Doc*)m_pDocument;
}
#endif //_DEBUG
// Cjohn52View message handlers
void Cjohn52View::OnLButtonDown(UINT nFlags, CPoint point)
{
// TODO: Add your message handler code here and/or call default
CView::OnLButtonDown(nFlags, point);
UpdateData(true);
if(m_RectEllipse.PtInRect(point))
{
if(m_ncolor==BLACK_BRUSH)
{
m_ncolor=GRAY_BRUSH;
}
else
{
m_ncolor=BLACK_BRUSH;
}
InvalidateRect(m_RectEllipse);
}
UpdateData(false);
}Multiple Document Interface Screen Shot Step By Step Algorithm Output 
Dialog Based Application Cs1255 Visual Programming Lab Windows SDK / Visual C++
Source Code visual Programming Algorithm Step by step procedural algorithm
// SRUTI3View.cpp : implementation of the CSRUTI3View class
#include "stdafx.h"
#include "SRUTI3.h"
#include "SRUTI3Doc.h"
#include "SRUTI3View.h"
#include "SRUTI.h"
#ifdef _DEBUG
#define new DEBUG_NEW
#undef THIS_FILE
static char THIS_FILE[] = __FILE__;
#endif
// CSRUTI3View
IMPLEMENT_DYNCREATE(CSRUTI3View, CView)
BEGIN_MESSAGE_MAP(CSRUTI3View, CView)
//{{AFX_MSG_MAP(CSRUTI3View)
ON_WM_LBUTTONDOWN()
//}}AFX_MSG_MAP
END_MESSAGE_MAP()
// CSRUTI3View construction/destruction
CSRUTI3View::CSRUTI3View()
{ // TODO: add construction code here }
CSRUTI3View::~CSRUTI3View()
{}
BOOL CSRUTI3View::PreCreateWindow(CREATESTRUCT& cs)
{
// TODO: Modify the Window class or styles here by modifying
// the CREATESTRUCT cs
return CView::PreCreateWindow(cs);
}
// CSRUTI3View drawing
void CSRUTI3View::OnDraw(CDC* pDC)
{
CSRUTI3Doc* pDoc = GetDocument();
ASSERT_VALID(pDoc);
// TODO: add draw code for native data here
}
/
// CSRUTI3View diagnostics
#ifdef _DEBUG
void CSRUTI3View::AssertValid() const
{
CView::AssertValid();
}
void CSRUTI3View::Dump(CDumpContext& dc) const
{
CView::Dump(dc);
}
CSRUTI3Doc* CSRUTI3View::GetDocument() // non-debug version is inline
{ ASSERT(m_pDocument->IsKindOf(RUNTIME_CLASS(CSRUTI3Doc)));
return (CSRUTI3Doc*)m_pDocument;
}
#endif //_DEBUG
// CSRUTI3View message handlers
void CSRUTI3View::OnLButtonDown(UINT nFlags, CPoint point)
{
CView::OnLButtonDown(nFlags, point);
SRUTI c;
c.DoModal();
}
// SRUTI.cpp : implementation file
#include "stdafx.h"
#include "SRUTI3.h"
#include "SRUTI.h"
#ifdef _DEBUG
#define new DEBUG_NEW
#undef THIS_FILE
static char THIS_FILE[] = __FILE__;
#endif
// SRUTI dialog
SRUTI::SRUTI(CWnd* pParent /*=NULL*/)
: CDialog(SRUTI::IDD, pParent)
{ //{{AFX_DATA_INIT(SRUTI)
m_name = _T("");
m_pname = _T("");
m_income = 0;
m_perc = 0;
//}}AFX_DATA_INIT
}
void SRUTI::DoDataExchange(CDataExchange* pDX)
{ CDialog::DoDataExchange(pDX);
//{{AFX_DATA_MAP(SRUTI)
DDX_Text(pDX, IDC_EDIT1, m_name);
DDX_Text(pDX, IDC_EDIT2, m_pname);
DDX_Text(pDX, IDC_EDIT3, m_income);
DDX_Text(pDX, IDC_EDIT4, m_perc);
//}}AFX_DATA_MAP
}
BEGIN_MESSAGE_MAP(SRUTI, CDialog)
//{{AFX_MSG_MAP(SRUTI)
ON_BN_CLICKED(IDC_BUTTON1, Onsubmit)
//}}AFX_MSG_MAP
END_MESSAGE_MAP()
// SRUTI message handlers
void SRUTI::Onsubmit()
{ UpdateData(true);
if((m_name,m_pname,m_income,m_perc)!=0)
{
MessageBox(“Please enter an integer”);
}
{ if((m_income>40000)&&(m_perc>75))
{ MessageBox("Eligible Candidate");
}
else
{ MessageBox("Not eligible candidate");
}
}
UpdateData(false);
}
Dialog Based Application Source CS1255 VISUAL PROGRAMMING LAB Output Screen shot
Create Notepad Application Using Rich Text Box Control in VB
Step by step Procedure Algorithm: notepad has been created Using Rich text box control in Visual Programming tool . Form1.Caption = "Untitled - Notepad" this command whenever you open the new notepad in there title is display as "Untitled - Notepad". Whenever you save the edit notepad file file.Filter = "Text (*.txt)|*.txt|All Files (*.*)|*.*" file.InitDir = "c:\" this command indicate save file as .txt extension and save file directory in c: , there notepad font indicate by following command file.ShowFont, Text1.FontName = file.FontName, Text1.FontBold = file.FontBold, Text1.FontItalic = file.FontItalic, Text1.FontSize = file.FontSize.
Output notepad application rich text box control in Visual programming  Source CODE Visual Programming Lap
Dim fn As String
Dim ul As Boolean
Dim st As Boolean
Dim m As Integer
Private Sub Form_Load()
m = 0
ul = False
st = False
End Sub
Private Sub Form_Resize()
If WindowState = 1 Then
Exit Sub
End If
Text1.Width = ScaleWidth
Text1.Height = ScaleHeight
End Sub
Private Sub Form_Unload(Cancel As Integer)
mnufileexit_Click
End Sub
Private Sub mnufilenew_Click()
If Text1 <> "" Then
msg = "The Text in the file has changed." & vbCrLf & "Do u wish to save the changes?"
res = MsgBox(msg, vbYesNoCancel, "Save File?")
Select Case res
Case vbYes
If fn = "" Then
mnufilesaveas_Click
Else
mnufilesave_Click
End If
Text1 = ""
Form1.Caption = "Untitled - Notepad"
Case vbNo
Text1 = ""
Form1.Caption = "Untitled - Notepad"
Case vbCancel
End Select
End If
End Sub
Private Sub mnufileopen_Click()
file.Filter = "Text (*.txt)|*.txt|All Files (*.*)|*.*"
file.InitDir = "c:\"
file.ShowOpen
If file.FileName = "" Then
Exit Sub
End If
fn = file.FileName
Open fn For Input As #1
Text1.Text = StrConv(InputB(LOF(1), 1), vbUnicode)
Close #1
Form1.Caption = file.FileTitle & " - Notepad"
End Sub
Private Sub mnufilesave_Click()
On Error GoTo errhandler
file.CancelError = True
file.Flags = cdlOFNHideReadOnly + cdlOFNOverwritePrompt + cdlOFNPathMustExist
file.Filter = "Text (*.txt)|*.txt|All Files (*.*)|*.*"
If fn = "" Then
file.FileName = ""
file.ShowSave
fn = file.FileName
End If
Open fn For Output As #1
Print #1, Text1.Text
Close #1
Form1.Caption = file.FileTitle & " - Notepad"
errhandler:
Select Case Err
Case 32755 ' Dialog Cancelled
End Select
End Sub
Private Sub mnufilesaveas_Click()
On Error GoTo errhandler
file.CancelError = True
file.Flags = cdlOFNHideReadOnly + cdlOFNOverwritePrompt + cdlOFNPathMustExist
file.Filter = "Text (*.txt)|*.txt|All Files (*.*)|*.*"
file.FileName = fn
file.ShowSave
fn = file.FileName
Open fn For Output As #1
Print #1, Text1.Text
Close #1
Form1.Caption = file.FileTitle & " - Notepad"
errhandler:
Select Case Err
Case 32755 ' Dialog Cancelled
End Select
End Sub
Private Sub mnufileexit_Click()
If Text1 <> "" Then
msg = "The Text in the file has changed." & vbCrLf & "Do u wish to save the changes?"
res = MsgBox(msg, vbExclamation + vbYesNoCancel, "Save File?")
Select Case res
Case vbYes
If fn = "" Then
mnufilesaveas_Click
Else
mnufilesave_Click
End If
End
Case vbNo
End
Case vbCancel
End Select
Else
End
End If
End Sub
Private Sub mnueditcut_Click()
If m = 1 Then
Clipboard.SetText Text1.Text
Text1.Text = ""
Else
Clipboard.SetText Text1.SelText
Text1.SelText = ""
End If
End Sub
Private Sub mnueditcopy_Click()
If m = 1 Then
Clipboard.SetText Text1.Text
Else
Clipboard.SetText Text1.SelText
End If
End Sub
Private Sub mnueditpaste_Click()
Text1.SelText = Clipboard.GetText
End Sub
Private Sub mnufont_Click()
On Error GoTo errhandler
file.Flags = cdlCFScreenFonts Or cdlCFPrinterFonts
file.ShowFont
Text1.FontName = file.FontName
Text1.FontBold = file.FontBold
Text1.FontItalic = file.FontItalic
Text1.FontSize = file.FontSize
errhandler:
Select Case Err
Case 32755 ' Dialog Cancelled
End Select
End Sub
Private Sub mnueditbc_Click()
On Error GoTo errhandler
file.CancelError = True
file.ShowColor
Text1.BackColor = file.Color
errhandler:
Select Case Err
Case 32755 ' Dialog Cancelled
End Select
End Sub
Private Sub mnueditfc_Click()
On Error GoTo errhandler
file.CancelError = True
file.ShowColor
Text1.ForeColor = file.Color
errhandler:
Select Case Err
Case 32755 ' Dialog Cancelled
End Select
End Sub
Private Sub mnuabt_Click()
MsgBox ("THIS IS NOTEPAD")
End Sub
Private Sub mnufontst_Click()
st = Not st
Text1.FontStrikethru = st
End Sub
Private Sub mnufontul_Click()
ul = Not ul
Text1.FontUnderline = ul
End Sub
Private Sub selectall_Click()
Text1.ForeColor = green
m = 1
End Sub
Create Scientific Calculator Using Command Array VISUAL PROGRAMMING LAB
Step by step procedure: create the form for calculator using visual basic tool like command Button, Text button. Just like output screen .write the source code for appropriate object command box, text box, finally run the program. Create 30 command button 12 for numeric value 16 for scientific calculation and two for calculate off and on
Screen shot Output of the Calculator Using Command Array VISUAL PROGRAMMING LAB  Source CODE Visual programming Lap Scientific Caluculation
Dim str, a, choice As String
Dim num1, num2, num3, n2 As Double
Dim n, ans, b As Long
Private Sub Command1_Click(Index As Integer)
str = str + Command1(Index).Caption
Text1.Text = str
num2 = Val(str)
End Sub
Private Sub Command10_Click()
choice = "sqr"
str = ""
End Sub
Private Sub Command11_Click()
choice = "pow"
str = ""
End Sub
Private Sub Command12_Click()
choice = "inv"
str = ""
End Sub
Private Sub Command13_Click()
choice = "root"
str = ""
End Sub
Private Sub Command14_Click()
choice = "oct"
str = ""
End Sub
Private Sub Command15_Click()
choice = "e"
str = ""
End Sub
Private Sub Command16_Click()
choice = "e-"
str = ""
End Sub
Private Sub Command17_Click()
choice = "fact"
str = ""
End Sub
Private Sub Command18_Click()
choice = "cube"
str = ""
End Sub
Private Sub Command19_Click()
Text1.Text = ""
str = ""
End Sub
Private Sub Command2_Click(Index As Integer)
choice = Command2(Index).Caption
num1 = Val(Text1.Text)
Text1.Text = ""
str = ""
End Sub
Private Sub Command20_Click()
MsgBox "calculator Off"
Unload Form1
End Sub
Private Sub Command3_Click()
Select Case choice
Case "+"
num2 = Val(Text1.Text)
num2 = num2 + num1
Text1.Text = num2
Case "-"
num2 = Val(Text1.Text)
num2 = num1 - num2
Text1.Text = num2
Case "*"
num2 = Val(Text1.Text)
num2 = num2 * num1
Text1.Text = num2
Case "/"
num2 = Val(Text1.Text)
num2 = num1 / num2
Text1.Text = num2
Case "sin"
num2 = Math.Sin((num2 * 3.14) / 180)
Text1.Text = num2
str = " "
Case "cos"
num2 = Math.Cos((num2 * 3.14) / 180)
Text1.Text = num2
str = " "
Case "tan"
num2 = Math.Tan((num2 * 3.14) / 180)
Text1.Text = num2
str = " "
Case "sqr"
num2 = num2 * num2
Text1.Text = num2
str = " "
Case "cube"
num2 = num2 * num2 * num2
Text1.Text = num2
str = " "
Case "root"
num2 = num2 ^ (1 / 2)
Text1.Text = num2
str = " "
Case "log"
num2 = Math.Log(num2)
Text1.Text = num2
str = " "
Case "e"
num2 = Math.Exp(num2)
Text1.Text = num2
str = " "
Case "e-"
num2 = Math.Exp(-num2)
Text1.Text = num2
str = " "
Case "fact"
If (num2 < 2) Then
num2 = 1
Text1.Text = num2
str = " "
Else
num1 = 1
While (num2 > 1)
num1 = num1 * num2
num2 = num2 - 1
Wend
Text1.Text = num1
str = " "
End If
Case "bin"
n = num2
b = 1
ans = 0
str = ""
While (n > 0)
x = n Mod 2
n = (n - x) / 2
ans = ans + (b * x)
b = b * 10
Wend
Text1.Text = ans
str = " "
Case "oct"
n = num2
b = 1
ans = 0
str = " "
While (n > 0)
x = n Mod 8
n = (n - x) / 8
ans = ans + (b * x)
b = b * 10
Wend
Text1.Text = ans
str = " "
Case "hex"
n = num2
b = 1
ans = 0
str = " "
While (n > 0)
x = n Mod 16
n = (n - x) / 16
Select Case x
Case 0, 1, 2, 3, 4, 5, 6, 7, 8, 9
s = x
str = Val(str) + Val(s)
Case 10
s = "A"
str = str + s
Case 11
s = "B"
str = str + s
Case 12
s = "C"
str = str + s
Case 13
s = "D"
str = str + s
Case 14
s = "E"
str = str + s
Case 15
s = "F"
str = str + s
End Select
Wend
Text1.Text = str
str = " "
Case "inv"
num2 = 1 / num2
Text1.Text = num2
str = " "
End Select
End Sub
Private Sub Command4_Click()
choice = "sin"
str = ""
End Sub
Private Sub Command5_Click()
choice = "cos"
str = ""
End Sub
Private Sub Command6_Click()
choice = "tan"
str = ""
End Sub
Private Sub Command7_Click()
choice = "log"
str = ""
End Sub
Private Sub Command8_Click()
choice = "bin"
str = ""
End Sub
Private Sub Command9_Click()
choice = "hex"
str = ""
End Sub
Result
Thus the calculator using command array was created successfully
Vc ++ and ODBC (data base connection) | Create database in MS Access link to the database with vc++ through ODBS and perform ADDNEW, MODIFY, DELETE
OBJECTIVE :
To create a database in MS ACCESS and to link the database with VC++ through ODBC and to perform ADDNEW, MODIFY, DELETE records from a table in the database.
PROCEDURE:
PROCEDURE TO CREATE A DATABASE:
1) Start -> programs -> Microsoft office -> Microsoft Access.
2) Select new -> blank database ->type the name of the database as COLLEGE -> click create.
3) Double click on select create table in design view type the following field names .
Name text
Branch text
Age number
( select the data type by clicking on the cell )
4) Close the table with a table name student.
5) Give some sample data in the table student.
PROCEDURE TO CREATE ODBC CONNECTIVITY:
6) Start -> settings -> control panel ->administrative tools -> data sources (ODBC).
7) Double click on Data sources (ODBC) -> user DSN -> add.
8) Double click drive to Microsoft Access (mdb) -> ODBC Microsoft Access setup dialog will appear.
9) Type the data source name -> DNS COLLEGE.
10) Click select … select the college mdb (database) into its path and press ok.
11) Press ok and close the ODBC dialog now the ODBC connection has been established.
PROCEDURE TO CREATE THE PROGRAM:
12) Run the MFC AppWizard (exe) to generate c:\odbc.
13) In the step1 select single document interface.
14) In step 2 select database view without file support.
15) Select data source -> database options window will appear.
16) Select ODBC ->DNSCOLLEGE , record set type -> DYNASET ->ok.
17) Select student table.
18) Deselect printing and print preview, press FINISH.
19) Select -> resource view -> IDR_MAINFRAME
20) Add three submenus in record add new(ID_RECORD_ADDNEW), modify record(ID_RECORD_MODIFY), delete record (ID_RECORD_DELETE),
21) Select -> dialog -> IDD_ODBC_FORM.
22) Insert 3 edit controls on the dialogand a command ( with caption clear field )
23) Using class wizard map the command message of the CODBC view class with all the submenus ID_RECORD_ADDNEW, ID_RECORD_MODIFY, ID_RECORD_DELETE, map the BN_CLICKED with IDC_BUTTON1 and map On Move with CODBC View.
24) Using class wizard create member variable for IDC_EDIT1, IDC_EDIT2, IDC_EDIT3 by selecting the variable names from the popup m_pset->m_name, m_pset->m_branch, m_pset->m_age, with suitable data type CString, CString, long.
25) Now the data form the table will be linked with edit controls of the dialog.
26) Edit the CODBCView.cpp with the following information in OnMove, On Record Delete, On Record Modify, On Button1 functions.
void COdbc2View::OnRecordAddnew()
{
// TODO: Add your command handler code here
m_pSet->AddNew();
UpdateData(true);
if(m_pSet->CanUpdate())
{
m_pSet->Update();
}
if(!m_pSet->IsEOF())
{
m_pSet->MoveLast();
}
m_pSet->Requery();
UpdateData(false);
}
void COdbc2View::OnRecordDelete()
{
// TODO: Add your command handler code here
CRecordsetStatus status;
try
{
m_pSet->Delete();
}
catch(CDBException *c)
{
AfxMessageBox(c->m_strError);
c->Delete();
m_pSet->MoveFirst();
UpdateData(false);
return;
}
m_pSet->GetStatus(status);
if(status.m_lCurrentRecord==0)
{
m_pSet->MoveFirst();
}
else
{
m_pSet->MoveNext();
}
UpdateData(false);
}
void COdbc2View::OnRecordModify()
{
// TODO: Add your command handler code here
m_pSet->Edit();
UpdateData(true);
if(m_pSet->CanUpdate())
{
m_pSet->Update();
}
}
void COdbc2View::OnButton1()
{
// TODO: Add your control notification handler code here
m_pSet->SetFieldNull(NULL);
UpdateData(false);
}
BOOL COdbc2View::OnMove(UINT nIDMoveCommand)
{
// TODO: Add your specialized code here and/or call the base class
switch(nIDMoveCommand)
{
case ID_RECORD_PREV:
m_pSet->MovePrev();
if(!m_pSet->IsBOF())
break;
case ID_RECORD_FIRST:
m_pSet->MoveFirst();
break;
case ID_RECORD_NEXT:
m_pSet->MoveNext();
if(!m_pSet->IsEOF())
break;
if(!m_pSet->CanScroll())
{
m_pSet->SetFieldNull(NULL);
break;
}
break;
case ID_RECORD_LAST:
m_pSet->MoveLast();
break;
default:
ASSERT(false);
}
UpdateData(false);
return true;
return CRecordView::OnMove(nIDMoveCommand);
}
27) Compile, run and test the applications.
PROGRAM :
SOURCE FILES :
Odbcview.cpp :
// odbc2View.cpp : implementation of the COdbc2View class
//
#include "stdafx.h"
#include "odbc2.h"
#include "odbc2Set.h"
#include "odbc2Doc.h"
#include "odbc2View.h"
#ifdef _DEBUG
#define new DEBUG_NEW
#undef THIS_FILE
static char THIS_FILE[] = __FILE__;
#endif
/////////////////////////////////////////////////////////////////////////////
// COdbc2View
IMPLEMENT_DYNCREATE(COdbc2View, CRecordView)
BEGIN_MESSAGE_MAP(COdbc2View, CRecordView)
//{{AFX_MSG_MAP(COdbc2View)
ON_COMMAND(ID_RECORD_ADDNEW, OnRecordAddnew)
ON_COMMAND(ID_RECORD_DELETE, OnRecordDelete)
ON_COMMAND(ID_RECORD_MODIFY, OnRecordModify)
ON_BN_CLICKED(IDC_BUTTON1, OnButton1)
//}}AFX_MSG_MAP
END_MESSAGE_MAP()
/////////////////////////////////////////////////////////////////////////////
// COdbc2View construction/destruction
COdbc2View::COdbc2View()
: CRecordView(COdbc2View::IDD)
{
//{{AFX_DATA_INIT(COdbc2View)
m_pSet = NULL;
//}}AFX_DATA_INIT
// TODO: add construction code here
}
COdbc2View::~COdbc2View()
{
}
void COdbc2View::DoDataExchange(CDataExchange* pDX)
{
CRecordView::DoDataExchange(pDX);
//{{AFX_DATA_MAP(COdbc2View)
DDX_FieldText(pDX, IDC_EDIT1, m_pSet->m_name, m_pSet);
DDX_FieldText(pDX, IDC_EDIT2, m_pSet->m_age, m_pSet);
DDX_FieldText(pDX, IDC_EDIT3, m_pSet->m_branch, m_pSet);
//}}AFX_DATA_MAP
}
BOOL COdbc2View::PreCreateWindow(CREATESTRUCT& cs)
{
// TODO: Modify the Window class or styles here by modifying
// the CREATESTRUCT cs
return CRecordView::PreCreateWindow(cs);
}
void COdbc2View::OnInitialUpdate()
{
m_pSet = &GetDocument()->m_odbc2Set;
CRecordView::OnInitialUpdate();
GetParentFrame()->RecalcLayout();
ResizeParentToFit();
}
/////////////////////////////////////////////////////////////////////////////
// COdbc2View diagnostics
#ifdef _DEBUG
void COdbc2View::AssertValid() const
{
CRecordView::AssertValid();
}
void COdbc2View::Dump(CDumpContext& dc) const
{
CRecordView::Dump(dc);
}
COdbc2Doc* COdbc2View::GetDocument() // non-debug version is inline
{
ASSERT(m_pDocument->IsKindOf(RUNTIME_CLASS(COdbc2Doc)));
return (COdbc2Doc*)m_pDocument;
}
#endif //_DEBUG
/////////////////////////////////////////////////////////////////////////////
// COdbc2View database support
CRecordset* COdbc2View::OnGetRecordset()
{
return m_pSet;
}
/////////////////////////////////////////////////////////////////////////////
// COdbc2View message handlers
void COdbc2View::OnRecordAddnew()
{
// TODO: Add your command handler code here
m_pSet->AddNew();
UpdateData(true);
if(m_pSet->CanUpdate())
{
m_pSet->Update();
}
if(!m_pSet->IsEOF())
{
m_pSet->MoveLast();
}
m_pSet->Requery();
UpdateData(false);
}
void COdbc2View::OnRecordDelete()
{
// TODO: Add your command handler code here
CRecordsetStatus status;
try
{
m_pSet->Delete();
}
catch(CDBException *c)
{
AfxMessageBox(c->m_strError);
c->Delete();
m_pSet->MoveFirst();
UpdateData(false);
return;
}
m_pSet->GetStatus(status);
if(status.m_lCurrentRecord==0)
{
m_pSet->MoveFirst();
}
else
{
m_pSet->MoveNext();
}
UpdateData(false);
}
void COdbc2View::OnRecordModify()
{
// TODO: Add your command handler code here
m_pSet->Edit();
UpdateData(true);
if(m_pSet->CanUpdate())
{
m_pSet->Update();
}
}
void COdbc2View::OnButton1()
{
// TODO: Add your control notification handler code here
m_pSet->SetFieldNull(NULL);
UpdateData(false);
}
BOOL COdbc2View::OnMove(UINT nIDMoveCommand)
{
// TODO: Add your specialized code here and/or call the base class
switch(nIDMoveCommand)
{
case ID_RECORD_PREV:
m_pSet->MovePrev();
if(!m_pSet->IsBOF())
break;
case ID_RECORD_FIRST:
m_pSet->MoveFirst();
break;
case ID_RECORD_NEXT:
m_pSet->MoveNext();
if(!m_pSet->IsEOF())
break;
if(!m_pSet->CanScroll())
{
m_pSet->SetFieldNull(NULL);
break;
}
break;
case ID_RECORD_LAST:
m_pSet->MoveLast();
break;
default:
ASSERT(false);
}
UpdateData(false);
return true;
return CRecordView::OnMove(nIDMoveCommand);
}
Odbcdoc.cpp :
// odbc2Doc.cpp : implementation of the COdbc2Doc class
//
#include "stdafx.h"
#include "odbc2.h"
#include "odbc2Set.h"
#include "odbc2Doc.h"
#ifdef _DEBUG
#define new DEBUG_NEW
#undef THIS_FILE
static char THIS_FILE[] = __FILE__;
#endif
/////////////////////////////////////////////////////////////////////////////
// COdbc2Doc
IMPLEMENT_DYNCREATE(COdbc2Doc, CDocument)
BEGIN_MESSAGE_MAP(COdbc2Doc, CDocument)
//{{AFX_MSG_MAP(COdbc2Doc)
// NOTE - the ClassWizard will add and remove mapping macros here.
// DO NOT EDIT what you see in these blocks of generated code!
//}}AFX_MSG_MAP
END_MESSAGE_MAP()
/////////////////////////////////////////////////////////////////////////////
// COdbc2Doc construction/destruction
COdbc2Doc::COdbc2Doc()
{
// TODO: add one-time construction code here
}
COdbc2Doc::~COdbc2Doc()
{
}
BOOL COdbc2Doc::OnNewDocument()
{
if (!CDocument::OnNewDocument())
return FALSE;
// TODO: add reinitialization code here
// (SDI documents will reuse this document)
return TRUE;
}
/////////////////////////////////////////////////////////////////////////////
// COdbc2Doc diagnostics
#ifdef _DEBUG
void COdbc2Doc::AssertValid() const
{
CDocument::AssertValid();
}
void COdbc2Doc::Dump(CDumpContext& dc) const
{
CDocument::Dump(dc);
}
#endif //_DEBUG
/////////////////////////////////////////////////////////////////////////////
// COdbc2Doc commands
HEADER FILES :
Odbcview.h :
// odbc2View.h : interface of the COdbc2View class
//
/////////////////////////////////////////////////////////////////////////////
#if !defined(AFX_ODBC2VIEW_H__C865C844_0839_466B_B4AA_484940B18BE2__INCLUDED_)
#define AFX_ODBC2VIEW_H__C865C844_0839_466B_B4AA_484940B18BE2__INCLUDED_
#if _MSC_VER > 1000
#pragma once
#endif // _MSC_VER > 1000
class COdbc2Set;
class COdbc2View : public CRecordView
{
protected: // create from serialization only
COdbc2View();
DECLARE_DYNCREATE(COdbc2View)
public:
//{{AFX_DATA(COdbc2View)
enum { IDD = IDD_ODBC2_FORM };
COdbc2Set* m_pSet;
//}}AFX_DATA
// Attributes
public:
COdbc2Doc* GetDocument();
// Operations
public:
// Overrides
// ClassWizard generated virtual function overrides
//{{AFX_VIRTUAL(COdbc2View)
public:
virtual CRecordset* OnGetRecordset();
virtual BOOL PreCreateWindow(CREATESTRUCT& cs);
virtual BOOL OnMove(UINT nIDMoveCommand);
protected:
virtual void DoDataExchange(CDataExchange* pDX); // DDX/DDV support
virtual void OnInitialUpdate(); // called first time after construct
//}}AFX_VIRTUAL
// Implementation
public:
virtual ~COdbc2View();
#ifdef _DEBUG
virtual void AssertValid() const;
virtual void Dump(CDumpContext& dc) const;
#endif
protected:
// Generated message map functions
protected:
//{{AFX_MSG(COdbc2View)
afx_msg void OnRecordAddnew();
afx_msg void OnRecordDelete();
afx_msg void OnRecordModify();
afx_msg void OnButton1();
//}}AFX_MSG
DECLARE_MESSAGE_MAP()
};
#ifndef _DEBUG // debug version in odbc2View.cpp
inline COdbc2Doc* COdbc2View::GetDocument()
{ return (COdbc2Doc*)m_pDocument; }
#endif
/////////////////////////////////////////////////////////////////////////////
//{{AFX_INSERT_LOCATION}}
// Microsoft Visual C++ will insert additional declarations immediately before the previous line.
#endif // !defined(AFX_ODBC2VIEW_H__C865C844_0839_466B_B4AA_484940B18BE2__INCLUDED_)
Odbdoc.h :
// odbc2Doc.h : interface of the COdbc2Doc class
//
/////////////////////////////////////////////////////////////////////////////
#if !defined(AFX_ODBC2DOC_H__6FE5F421_C65C_44B3_818A_CD4C12718C8E__INCLUDED_)
#define AFX_ODBC2DOC_H__6FE5F421_C65C_44B3_818A_CD4C12718C8E__INCLUDED_
#if _MSC_VER > 1000
#pragma once
#endif // _MSC_VER > 1000
#include "odbc2Set.h"
class COdbc2Doc : public CDocument
{
protected: // create from serialization only
COdbc2Doc();
DECLARE_DYNCREATE(COdbc2Doc)
// Attributes
public:
COdbc2Set m_odbc2Set;
// Operations
public:
// Overrides
// ClassWizard generated virtual function overrides
//{{AFX_VIRTUAL(COdbc2Doc)
public:
virtual BOOL OnNewDocument();
//}}AFX_VIRTUAL
// Implementation
public:
virtual ~COdbc2Doc();
#ifdef _DEBUG
virtual void AssertValid() const;
virtual void Dump(CDumpContext& dc) const;
#endif
protected:
// Generated message map functions
protected:
//{{AFX_MSG(COdbc2Doc)
// NOTE - the ClassWizard will add and remove member functions here.
// DO NOT EDIT what you see in these blocks of generated code !
//}}AFX_MSG
DECLARE_MESSAGE_MAP()
};
/////////////////////////////////////////////////////////////////////////////
//{{AFX_INSERT_LOCATION}}
// Microsoft Visual C++ will insert additional declarations immediately before the previous line.
#endif // !defined(AFX_ODBC2DOC_H__6FE5F421_C65C_44B3_818A_CD4C12718C8E__INCLUDED_)
How to Create Quiz Application In Visual Baisc
To create a Quiz application by using VB 6.0
Source Coding in Visual Programming
1.ActiveX Control
A.User Control
Public Property Get result() As Double
result = Val(Form3.Text2.Text)
End Property
Private Sub Command1_Click()
Form1.Show
End Sub
Private Sub Command2_Click()
Form2.Show
End Sub
Private Sub Command3_Click()
Form3.Show
End Sub
B.Form 1
Private Sub Command1_Click()
If Option2.Value = True Then
Text1.Text = Val(Text1.Text) + 10
End If
If Option6.Value = True Then
Text1.Text = Val(Text1.Text) + 10
End If
Me.Hide
End Sub
C.Form 2
Private Sub Command1_Click()
If Option1.Value = True Then
Text1.Text = Val(Text1.Text) + 10
End If
If Option6.Value = True Then
Text1.Text = Val(Text1.Text) + 10
End If
Me.Hide
End Sub
D.Form 3
Private Sub Command1_Click()
If Option3.Value = True Then
Text1.Text = Val(Text1.Text) + 10
End If
If Option5.Value = True Then
Text1.Text = Val(Text1.Text) + 10
End If
Text2.Text = Val(Form1.Text1.Text) + Val(Form2.Text1.Text) + Val(Text1.Text)
Me.Hide
End Sub
2.Standard EXE
a.Form 1
Private Sub Command1_Click()
Form2.Show
Me.Hide
End Sub
b.Form 2
Private Sub Command1_Click()
Form3.Show
Form3.Text2.Text = UserControl11.result
Me.Hide
End Sub
c.Form 3
Private Sub Command1_Click()
Data1.Recordset.AddNew
Data1.Recordset.Fields(0) = Text1.Text
Data1.Recordset.Fields(1) = Val(Text2.Text)
Data1.Recordset.Update
End Sub
Private Sub Command2_Click()
DataReport1.Show
End Sub
Private Sub Command3_Click()
End
End Sub
Private Sub Form_Load()
Text1.Text = Form1.Text1.Text
End Sub
Quiz application by using VB 6.0
Flag counter


